
Watertwo installation
Plan carefully.
Fit confidently.
A practical guide to fitting Watertwo to suitable external 40mm ABS bath or shower waste pipework.
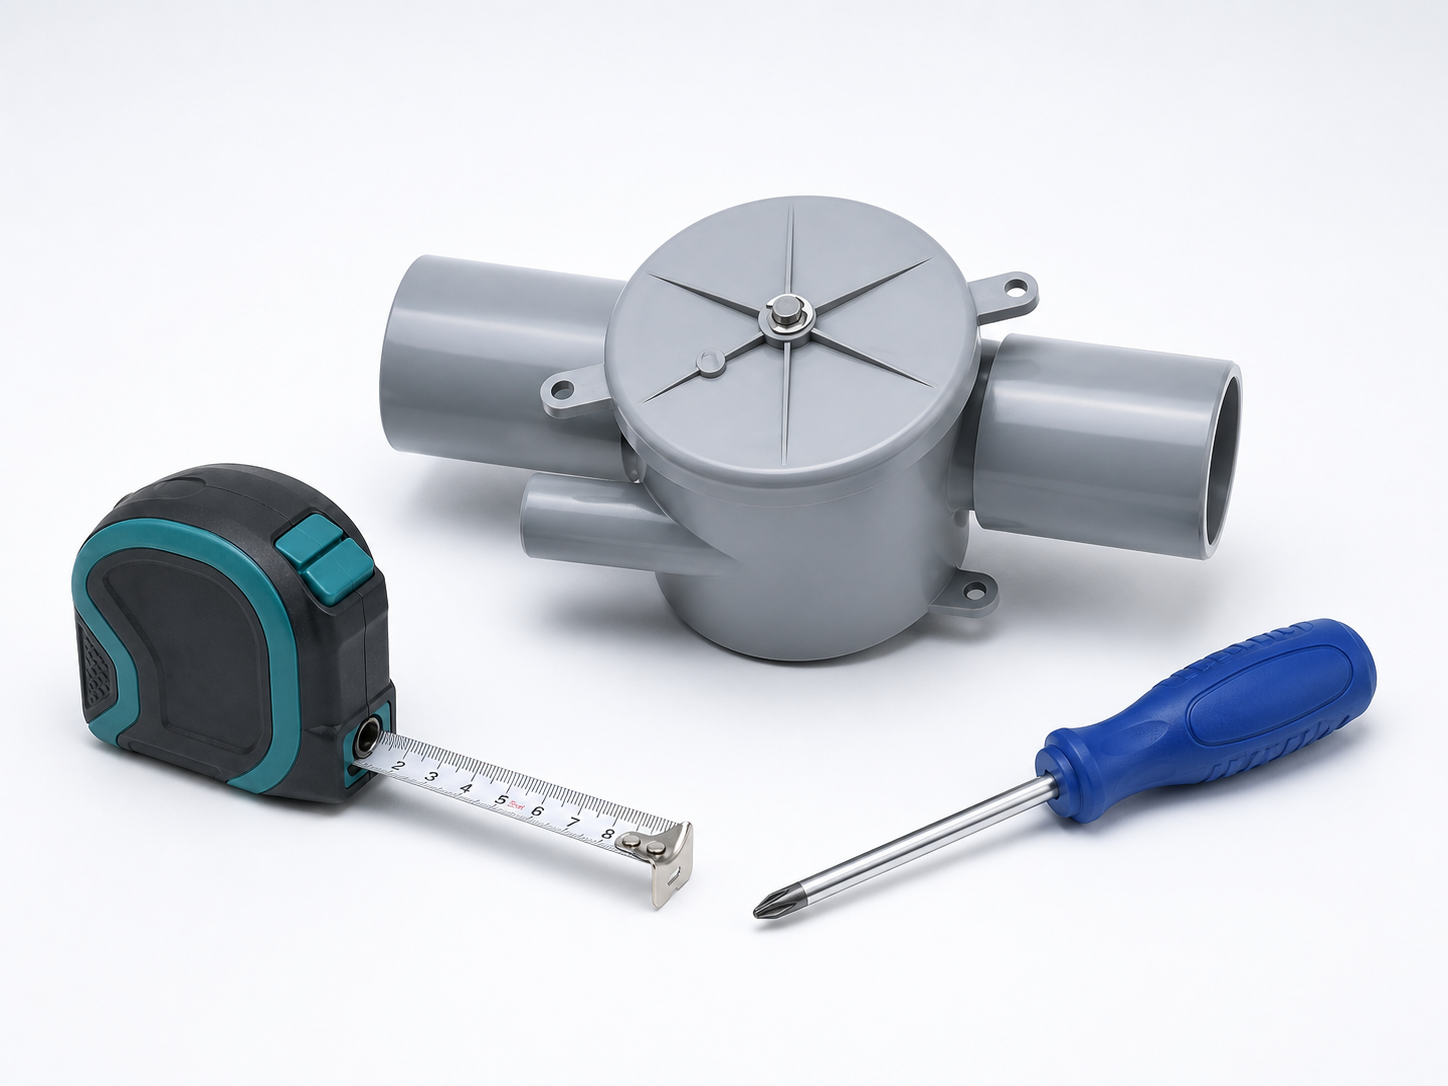
Before cutting any waste pipe
Confirm that the pipework is suitable 40mm ABS waste pipe and can be joined using the intended method.
PVC cement creates a permanent joint. A cutting or positioning error may not be reversible. If the pipe size, material, access or route is uncertain, stop and ask for fitting advice.
Preparation
Check the installation before you begin
Pipework
- Identify the external waste pipe serving the bath or shower.
- Confirm the pipe is suitable 40mm ABS.
- Check the pipe is clean, sound and accessible.
Position
- Allow space below the valve for operation.
- Plan the outlet-hose route towards the garden.
- Make sure fixings can be safely secured.
Safety
- Secure ladders when working at height.
- Use appropriate tools and protective equipment.
- Seek competent help if you are not confident.
Stage one
Locate, measure and dry fit
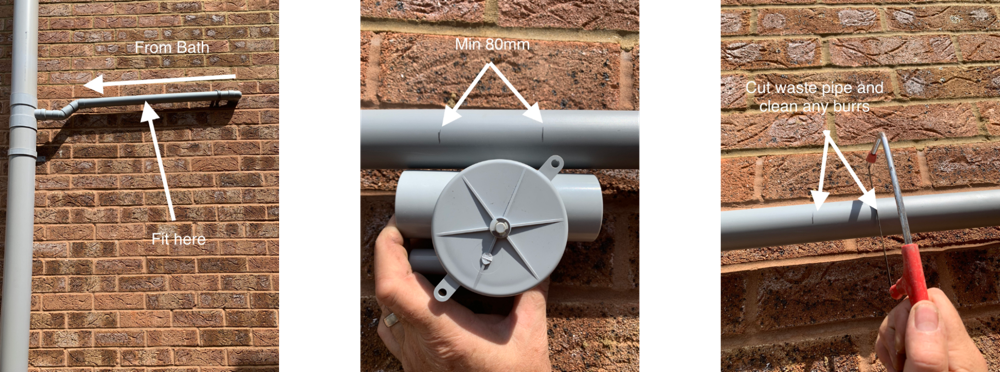
1
Locate the waste pipe
Identify the external waste pipe from the bath or shower, which is often at a higher level.
2
Mark the position
Choose a clear, operable location and mark a minimum 80mm section as described in the original instructions.
3
Cut and clean
Cut the waste pipe carefully and remove burrs so the jointing surfaces are clean.
4
Dry fit first
Test the valve position without adhesive. Confirm the cut length, valve operation and three supporting-screw positions.
Stage two
Join and secure the valve
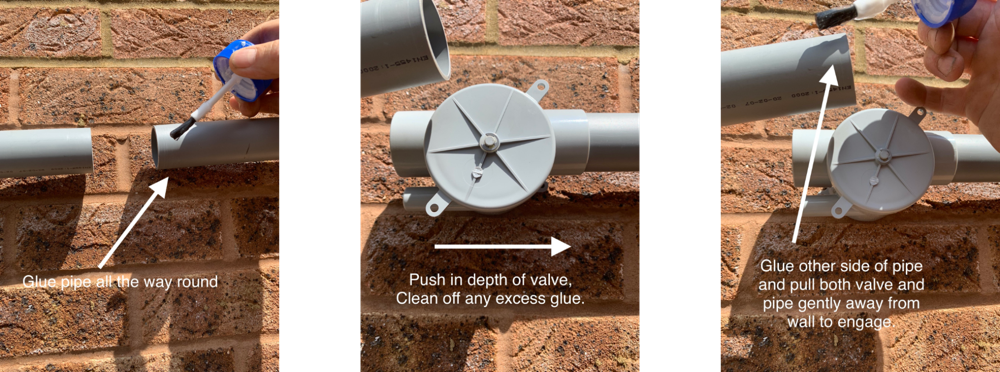
5
Prepare the first joint
Remove dirt or grease. Apply the specified PVC cement evenly around the pipe to the required depth.
6
Seat the valve
Push the valve fully home and remove excess cement.
7
Complete the second joint
Repeat for the other side, moving the pipe only as much as necessary to engage the valve fully.
8
Fit the supporting screws
Secure the three valve fixings if they were not already completed during the dry fit.
Stage three
Add the controls and outlet
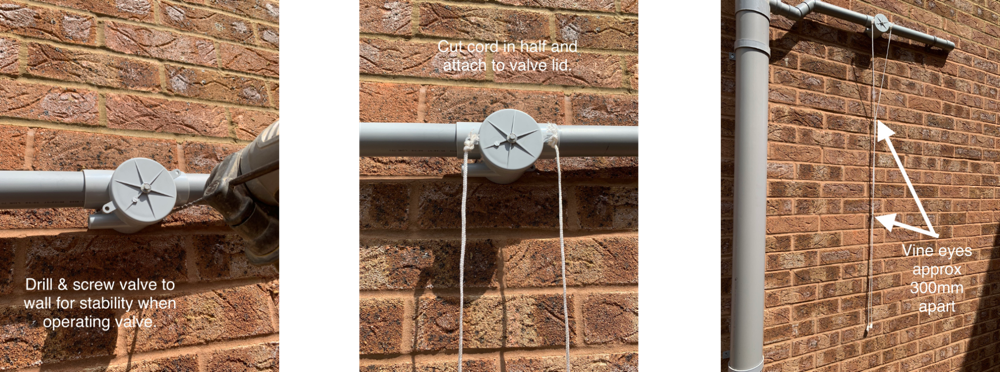
9
Attach the pull cords
Cut the supplied cord in half and attach one cord to either side of the valve lid.
10
Mark the first eyelet
Pull the cords together and hold them directly below the valve, approximately 300mm down, to mark the first eyelet screw.
11
Fit the second eyelet
Fix the first eyelet, feed both cords through it, then mark and fix the second eyelet approximately 300mm below the first.
12
Attach the toggles
Attach the two supplied toggles to the ends of the cords.
13
Connect the outlet hose
Attach a 16mm internal-diameter (21mm external-diameter) hose to the valve outlet and secure it with a stainless-steel jubilee clip.
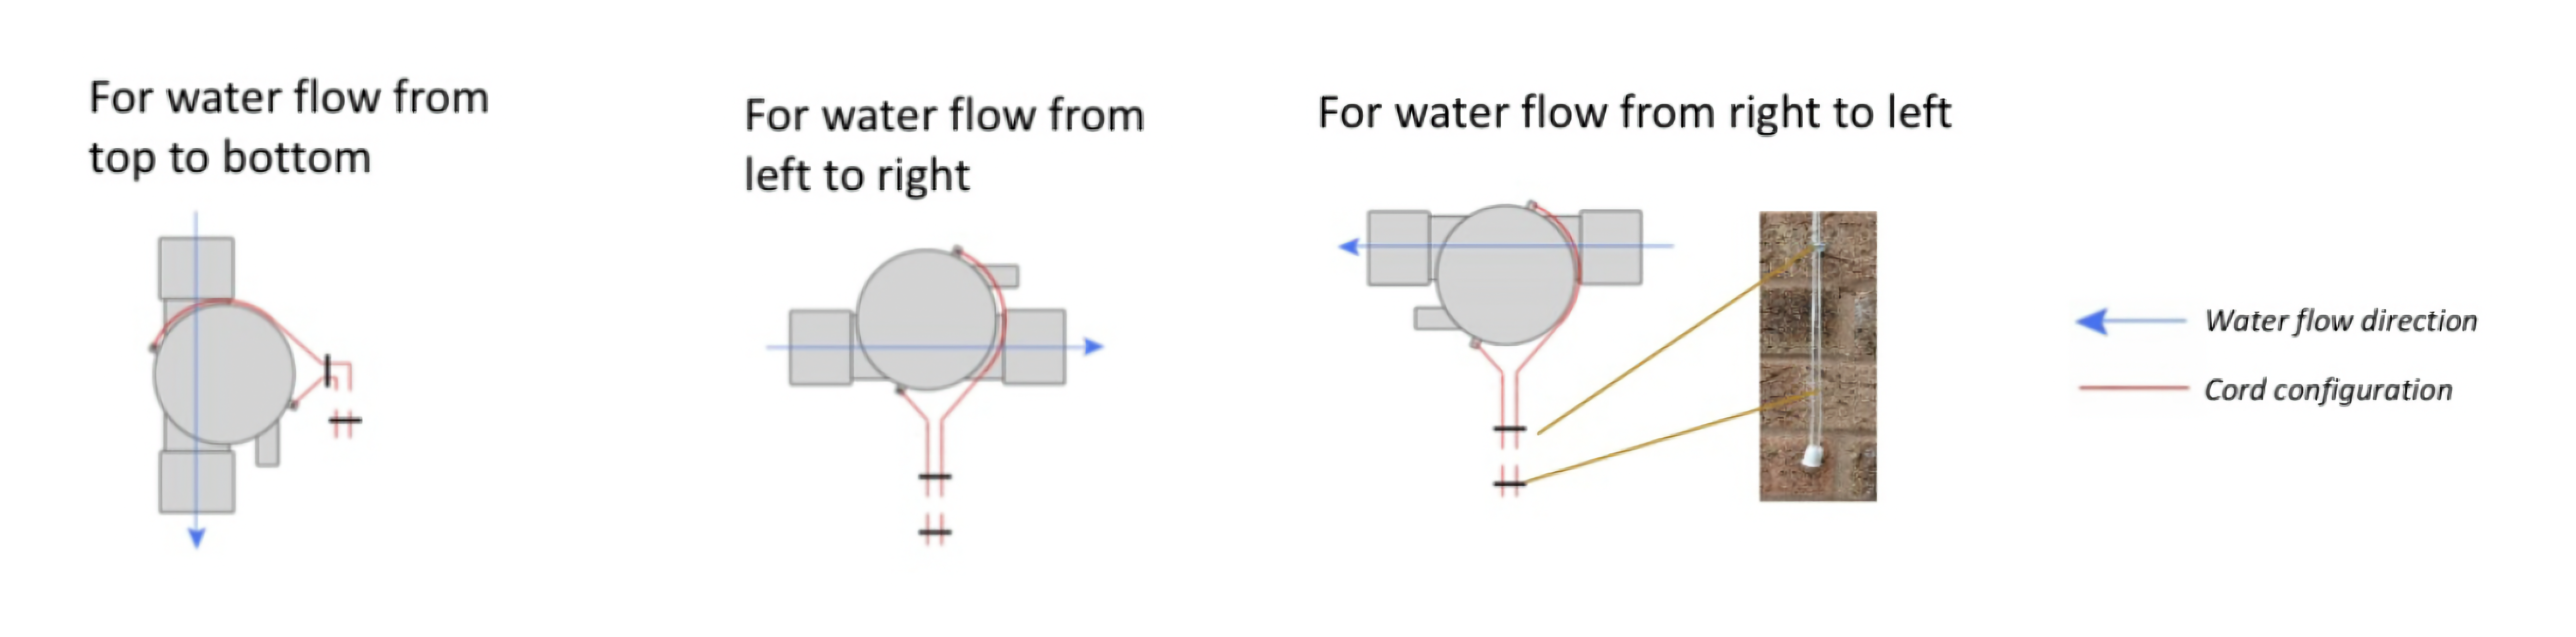
Cord configuration
Match the controls to the water-flow direction
The PDF shows three arrangements: vertical flow, left-to-right flow and right-to-left flow.
Use the diagram to route the cords for your valve orientation. After installation, confirm which toggle selects the normal drain route and which selects the garden outlet before relying on the system.
Check twice. Cut once.
If anything about the pipe size, material or position is uncertain, ask before beginning.